LIFE TALES: Approaching 80 – Ageing is inevitable – th’is nowt to be done about it!

During my adult life I’ve tried not to think too much about age. Each decade has been different, with their ups and downs but all different. I must admit that approaching 80 felt quite diaunting but my health and fitness were still at a high level. 

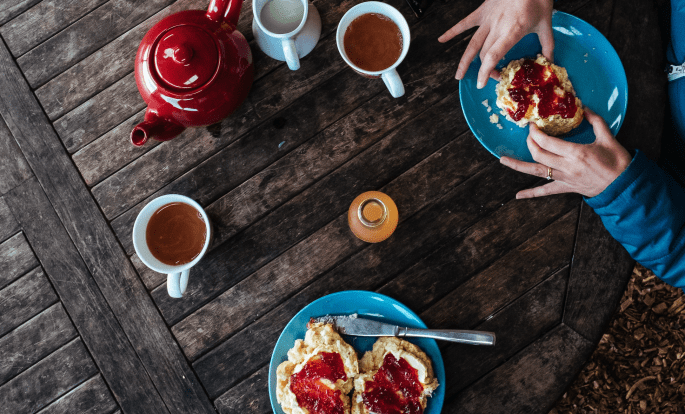
My birthday came and was celebrated in style with a fantastic party organized by the whole family. We had a wonderful tea party at my sons; bunting galore; every type of scone, cake and savoury; tea served in beautiful china cups from proper tea pots – all perfect! Many, many guests attended, some not seen for years. It is a memory that will live with me forever. There were loads of photos in a lovely album …. maybe my granddaughter will share some! 

Then unfortunately my knees began to be a concern. Twelve years previously after my hip replacement I was warned my knees could become a problem – how true! In the last five years both have been replaced. The right one, no problem.  

But the left has dictated a change to my whole life; only being given a 50-50 chance of a full recovery has been hard to accept. Many activities I took for granted – long walks, dancing, yoga – are no longer possible. Getting around day-to-day – housework and shopping doable, but not the pleasurable stuff that I loved. 

Ageing is inevitable – th’is nowt to be done about it! We all have something to put up with. And it could be worse – like a car the engine slows over time and bits wear out. On the positive side I am surrounded by family and friends who support and encourage me.  

I live in a lovely flat which is light, airy and easy to get around, surrounded by grass and trees. I have my own car – a family gift for my 80th. I’m often taken to the theatre to see ballet and musicals which I enjoy very much ….. and of course there’s the Pantomime every Christmas! 

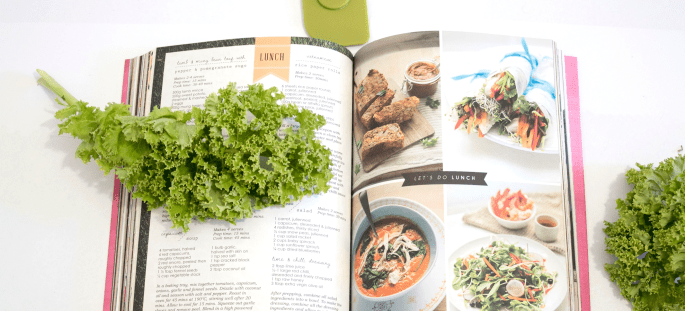
We eat out , trying many and varied types of cuisines and styles – a particular favourite currently is Vegan, a fantastic and amazing discovery after my youngest Granddaughter introduced me to it! 

Maybe these later years are not as physically fulfilled as I would have wished, but in all other ways I am content. I’m so lucky that food and my cooking can give me a purpose and keep me in touch with people. 

On a more personal level I must say my grandchildren give me so much pleasure and interest – watching them develop from cute and loveable children through their teens into hardworking, responsible young adults who luckily still find the time to keep me and part of their new lives even though they live, study and/or work in ever changing locations. 

I love them all dearly xx 


BAKING TIPS: Food Fashions – from WW2 rations to diet trends. Plus, a vegan tart recipe.

Fashions come and go, everything from clothes to music to lifestyle and more – but I believe food is the most important. Unless they have a sound, valid, medical reason diets, however, not my thing! Most diets are fads or fancies driven purely by the need to Sell! Sell! Sell! 

What I do agree with is that all bodies require the correct fuel – mainly fresh produce and home-produced dishes. I often hear comments saying people were all short of food during the war…well, that’s rubbish! Admittedly there was strict rationing and foodstuffs were hardly ever imported, if at all.  

I was six years old at the outbreak of WW2 in 1939. We lived in an extremely poor area and had very little money. Our hose was one of eight in a yard – with lavvies at the bottom end! It was a mixed group  – every age from new-borns to ninety year-olds – all decent, hard-working families. No-one was starving. The grubby patch of grass in the middle of the yard eventually yielded root vegetables and cabbages.  

All the women could cook – there was no option, they had to! Each family survived perfectly well. There was a butcher just up the road, a small shop (I do mean small, it was just someone’s home!) selling all manner of food and household essentials. My Mum would send me out to buy a pennorth (literally a “pennies worth”) of barm (fresh yeast) to bake her bread. I used to dip my finger in, I loved the taste. When I’d get home Mum would say “thi’s not a pennorth here, no way”! People, no matter how poor, knew how to manage. 

So, back to diets.

The recent trend towards veganism I can fully understand. My youngest granddaughter became vegetarian when 15 years old and now, since she was 19, has been vegan. It’s been fascinating for me to follow this voyage of discovery. Cutting down on animal products and eating more plant based items is a sensible move. I’ve really enjoyed experimenting with different ingredients and elements, creating new dishes and applying a vegan approach to older “favourites”.  

Supermarkets have cottoned on to the trend and stock a wide range of vegan ingredients so you can create your own dishes. Don’t buy the ready meals too often; I know they can be helpful occasionally but not every day. That’s where the faulty eating and diet lies! Take advantage of the easy ways but do try and cook from scratch more often. Jamie Oliver’s recent TV series on vegetable dishes was excellent. 

RECIPE

I have tried a wide range of baked savouries – all the usual tarts and pies. Vegan pastry (using Trex) works well. 

For Pastry Bases – lining quiche dishes, oblong swiss-roll tins and small tart tins – not forgetting to add grated cheese (Violife works well), herbs and small seeds such as sesame, linseed and poppy –seed to the dry pastry mix. 

Spread your base with fried onions mixed with Violife (other vegan brands are available!) cream cheese, then top with any of the following; 

  • Sliced tomatoes, chopped olives, blanched broccoli sprigs, chopped spring onions, peppers and , mushrooms 
  • Tinned flageolet or cannellini beans 
  • Jars – Artichoke heartsasparagus spears, sundried tomatoes 

……. just to provide you with an idea! 

Normally I would pour over the toppings a drizzle of cream and beaten, seasoned egg with a large dollop of mayonnaise and mustard added. 

Of course these dairy-based products are not appropriate for vegans, just“flexitarians”! However, evaporated milk is vegetarian and other plant-based milks – oat, soya, etc – can be mixed with more vegan cheeses – cream,  grated or cubed. 

Remember – don’t drown your tart, DRIZZLE!  

Sprinkle the surface with your chopped herbs and paprika before baking. In a hot oven start off your pastry base – always use a heated baking tray on which to place the tart tins. If using (pottery) quiche dishes it is advisable to pre-cook your pastry base for 10-15 mins before adding your fillings. 

Anyway, turn down the heat to medium after 15 minutes to enable slower “cooking through” for another 30-40 mins according to the size and depth of the tin.  

These items make excellent sharing food for parties or gatherings. I serve with mixed salads and roast or jacket potatoes. 

Bon Appetit!

I’d love to see if you trial this recipe. Send me your pictures – I’m @gran.e.bakes on Instagram.

BAKING TIPS: My trusty cookery books

Whilst in lecture mode (apologies!) – appreciating a lot of this stuff is now found on your phone and the internet – a word on cookery books (I have lots and lots of them) and their authors.

Try not to be influenced by glossy pictures of perfect looking meals. You’d be shocked by the devious methods used on food to obtain those shiny, pristine results, definitely not to be eaten! 

Trust cooks who have a more relaxed attitude and are not overly fussy or “cheffy”. Dishes need to be welcoming and say “eat me”, not “see how beautiful this looks on a plate. My personal favourites are: 

Delia Smith 

The first TV cook I really watched from her first appearances on Family Fare which ran between 1973 and 1975. She is always very calm and practical, clearly explaining the basics, telling you not to worry when things go wrong. I have all her books from through the years and refer to them constantly. 

Jamie Oliver 

From first appearing on TV in the late 1990’s I have followed his career and admired his positive attitude. Right up to date I recommended his books to my Grandson when he left home to begin his University stint. 

James Martin 

A down to earth Yorkshire lad whose books give a constant reminder of his roots (and his Gran!); great on British cooking.  

Nigel Slater 

His books are a constant joy to read, providing endless ideas on how to use fresh produce. 

But the little book which is most used is the Be-Ro Recipe Book.

A tiny, free paperback booklet containing the ultimate in method and advice. First printed in 1923 and now into it’s 41st edition (available to download here), versions from previous years are available from Amazon – at a price! Ask your Granny if she still has her old copy; my last one was the 40th edition. This little gem tells you everything you ever need to know about baking.  

Do you have a favourite cookery book? Let me know – I’m @gran.e.bakes on Instagram.

BAKING TIPS: Biscuits

Easy to make, good to eat and great for sharing here are two tried and tested family favourites. 

Couple of hints and things to remember …… 

  • a) leave a space between “splodges” when spooning mix onto your baking tray as they’ll spread during baking 
  • b) biscuits are crisp, cookies are softer, so there’s a longer oven time for biscuits. But keep an eye on them as they can burn easily! 

Ginger Biscuits 

Heat oven to 160-170F, gas mark 3. Have two large baking trays or three medium – butter greased and baking paper lined ready. 

  1. First mix together: 
  • 8oz self-raising flour 
  • Two teaspoons of ground ginger 
  • 4oz golden caster sugar 
  • A good pinch of sea-salt 

2. Then melt: 

  • 3oz butter 
  • Two tablespoons of Golden Syrup 

And mix together with the dry ingredients. 

3. Spoon the dough mix (heaped teaspoon or so) onto the baking trays. 

4. Bake for around 15 minutes, by which time the mix should have spread and be golden brown. 

If you have any glace ginger press small pieces into the mix whilst still warm. This will crisp up as they cool (leave on tray). 

5. Finally, remove to a wire rack. 

Peanut Butter Cookies 

You’ll need:

  • 5oz of butter
  • 5oz peanut butter
  • chopped peanuts
  • 4oz caster sugar
  • 4oz brown sugar
  • 1 large egg
  • 1/2 teaspoon of vanilla essence
  • 4oz self-raising flour
  • 1/2 teaspoon bicarbonate of soaf
  • 1/2 teaspoon of salt
  • 4oz porridge oats
  1. Soften the butter (not melted) and mix with the peanut butter (crunchy or smooth, your choice). Add the chopped peanuts also. 
  2. Mix the golden caster sugar together with the soft brown sugar 
  3. Beat the egg and stir through half a teaspoon of vanilla essence. 
  4. Now mix the self-raising flour, bicarbonate of soda, salt with and porridge oats. 
  5. Now bring all these mixes together a little at a time, mixing with a palette knife. 
  6. Form the “dough” into small balls, walnut sized and place onto the prepared baking trays well apart 
  7. Flatten slightly with a fork and sprinkle with chopped peanuts 
  8. Bake in a hot oven 170-180F, Gas Mark 4-5. 

If you want cookies 12-15 minutes, biscuits turn down and cook for longer until crisp. 

I’d love to see if you trial this recipe. Send me your pictures – I’m @gran.e.bakes on Instagram.

BAKING TIPS: Loaf Cakes.

It’s well known amongst those around me that I’d much rather bake a cake than do housework. Hence my joy when my granddaughter suggested the Gran E Blog. 

Talking about food and baking, researching old recipes, test baking, testing ideas through my “guinea pigs” – neighbours, family and friends. What a great excuse to stay in the warm during horrible weather! 

Tea Loaves

A good alternative to scones if you’re having folks in for a cuppa. Non-yeast of course! I leave “proper “bread making to my son who does this all the time – maybe it’s a stronger pair of hands to bash out the dough?! 

Tea breads are mostly fruity using any dried fruit or banana (with dates and/or nuts), baked in a 2lb loaf tin lined with two broad strips of greaseproof paper, long ends left hanging to make lifting out simple. They can be made fatless if using a high quantity of fruit (for moistness) – ideas to follow. These breads are meant to be served sliced and buttered. 

There are many variations of these loaves. The methods of combining Fats And sugar are: 

  • Melting 
  • Rubbing in 
  • Creaming 

SULTANA LOAF

Very simple and a good for the children! Pre-heat the oven to 180f (gas mark 4) and then you’ll need: 

  • 8oz of wholewheat self-raising flour 
  • 6oz of Demerara sugar 
  • 8oz Golden Sultanas 
  • 6 fluid oz of hot tea 
  • 1 Large egg 
  • A good pinch of salt 
  1. Firstly place the fruit and tea in a bowl and allow to soak, a minimum of one hour but longer if possible.
  2. Then simply combine this with the flour, salt and sugar, beat in the egg and stir in. 
  3. Spread mixture into the bread tin and place in the oven. 
  4. Check after 40 minutes. Cover with greaseproof paper if browniong too much, then lower heat if necessary and continue baking for another 20 mins ish, until a skewer test is clean and there’s no sticky bits from the middle of the tin. 
  5. Remove from oven but leave in the tin and cool on a wire rack. 

Banana Loaf with Dates or Walnuts 

Pre-heat oven to Gas Mark 4 (180F). You’ll need: 

  • Three large or four medium ripe bananas mashed with a fork 
  • 3oz butter 
  • 4oz caster sugar (golden is best) 
  • 1 large egg, beaten 
  • 8 oz self raising flour 
  • 2 oz of either chopped dates or walnuts 
  1. Prep your loaf tin as before. 
  2. Cream the butter and sugar together. 
  3. A little grated orange or lemon peel can be added if available – not essential but a good additional flavour 
  4. With a large metal spoon fold in – this means this means gently lifting the mix over and over so as not to knock out the air you have beaten into the mix. 
  5. Next – also gently – fold in the fruit mix, spoon into the tin and level off the top. 
  6. As before cook for 40 mins, check, cover if necessary and cook for 15-20 mins more until firm. 
  7. Remove from the oven but leave in the tin to cool, then take out. 

My “Condensed Milk” Loaf 

This utilises one of my favourite ingredients plus mixed dreied fruit, chopped apple and apricots. 

NOTE – Dried apricots; I like to soak them in boiling water – enough to just cover – in a bowl overnight, they should absorb the liquid. Chop ‘em up, place into clean glass jars, topping up with any booze left in bottles. I’m sure there’s always odds and ends of wine, sherry, gin, brandy or liqueurs you can use. Keep jars in the fridge until needed! 

Prep tin as previous,pre-heat oven to 160-170F, Gas Mark 3. This one takes longer to cook! You’ll need: 

  • 12oz approx of dried fruit, chopped apple and apricot mix 
  • Chopped nuts can be added but are not essential 
  • 3oz butter 
  • Half a tin or one tube of condensed milk (I thonk Nestles is best!) 
  • 2oz soft dark brown sugar 
  •  2 large eggs, beaten 
  • 8oz self-raising flour 
  • One flat teaspoon of baking powder 
  1. Beat together butter, sugar and condensed milk, gradually adding in the eggs while still beating. 
  2. Next mix in the fruits, finally adding in the flour, salt and baking powder 
  3. Transfer this all to the tin, smoothing off the top but slightly hollowed in the centre 
  4. Bake for one hour and fifteen minutes, checking and covering if necessary after 55-60 mins.  
  5. Remove from the oven and cool as before in the tin. 

Of course you can experiment with lots of different flavours. What have you tried?

I’d love to see if you trial this recipe. Send me your pictures – I’m @gran.e.bakes on Instagram.

BAKING TIPS: Ovens. A bad workman always blames his tools.

Something I’ve learnt over time is that no two ovens are the same.

During my working life as a cook I have used many differing ovens and ranges – Large, Small, Domestic, Commercial, Gas, Electric, Aga and the rest. 

Recipes can only provide indicative temperatures and cooking times, the cook must be flexible in applying these to their own environment.

This is a major reason why many new cooks suffer disasters; be prepared to test and try, then test and try again! 

When I was demonstrating and asked to give definitive times and temperatures my advice was always to be prepared to be flexible and to use your own judgement; even experienced cooks get things wrong, that’s how they learn! 

So be comfortable with experimenting when you’re getting to know your oven.

Hope this helps. Bye for now!

LIFE TALES: My time in Jersey – Part 1.

My next chapter of experience came about in a rather sad way. My parents left Sheffield in the late 1950’s, very soon after I had married. They moved to Jersey in the Channel Islands, a place where we had spent many wonderful holidays.

My father was becoming quite unwell. He suffered from spinal issues related to his former job in the steel works along with lung and chest difficulties. My mother was a dress-maker who could work privately at home or in shops doing alterations. She decided to go over to Jersey and check out the possibilities for work and accommodation. They were definitely not retiring as we weren’t that well off! 

My mum was convinced she’d find work – she was a very talented dress-maker and copied fashions from magazines and films. In my teens I was always the best dressed girl at the City Hall Saturday dances. 

At this time in the Fifties restrictions on moving to the Channel Islands were not as limiting as they later became. So, off they went and found a flat and jobs. The flat was above a jeweller, an old established firm which took care of clocks in public buildings. After a chat my Dad was trained up to drive around to various locations and tending to their locks – winding and cleaning. It was an ideal role for his circumstances and he loved pottering around in his small, aged Morris car. Unfortunately, he soon became very ill and was diagnosed with lung cancer. He only lasted a few short months in Jersey. I was there with my toddler daughter for the final weeks. 

My Mum had built up a good business but was finding life very stressful. I had a brother, ten years younger than me, who went to live with her for a short while. He had trained as a photographer and very quickly found a job. Eventually Mum decided to try out the Bed and Breakfast trade. She rented a lovely old house and quickly became established…

To be continued. Bye for now!

LIFE TALES: Country Cooking

I really would have liked a place of my own but lacked finance. My husband was never keen on the career path I was following, working in pubs! So I decided to start a home-based catering operation. I supplied food for parties, lunches and dinners at home, and often to various pubs in and around the area. 

The kitchen in our home was large and well fitted. We had a big utility room and storage areas in the garage (no car ever saw the inside of those walls)! All well equipped and ready to go, Country Cooking was born. 

There wasn’t any problem with getting work. Three local pubs ordered meat pies on a weekly basis; a restaurant asked for a selection of deserts; there were bookings to cater for parties and buffet lunches. A family friend generously donated headed stationary and aprons decofetd with a lovely logo – sorted! 

More on this venture soon. Bye for now.

BAKING TIPS: Scones (how do you pronounce it?!)

Hello Again!

Let’s continue with scones. This is a similar method to pastry but with a different ratio of fat to flour. Scones need a hot oven so don’t forget to pre-heat to around 220 degrees, around gas mark 7 or 8.

The basic ingredients for 6-9 scones (depending on size!): 

  • 10oz [284g] Self raising flour 
  • 2oz [57g] butter 
  • ½ teaspoon salt 
  • A large egg (beaten) 
  • Milk (around ½ a cup) to add gradually 

For sweet scones: 

  • 2oz [57g] of caster sugar  
  • 3-7oz ([85-190g] dried mixed fruit, chop small especially if using apricots or dates 

Savoury Scones: 

5oz [140g] or so grated cheese 

Teaspoon of mustard mixed in with the egg 

Herbs/Olives/Sundried Tomatoes can be added to the dry mix 

After rubbing in the fat into the flour add your dry ingredients. Next add the beaten egg and mix with a palette knife. The dough should be much softer than pastry but not sticky wet!

Handle the dough as little as possible – the heat and moisture from your hands can have a significant impact. Form into a soft ball on a floured work surface. Pat this ball gently out into a flat shape about ¾inch [2cm] thick, but not too thin.

For small scones use your smallest serrated round cutter. Alternatively, pat into larger circles and cut across the top into wedge shapes. Brush the top of your scones with milk; for cheese scones sprinkle a little grated cheese over the tops. 

Keep an eye on your scones whilst in the oven, they cook quickly. You’ll see them rise after about ten minutes, then need a further 10-15 mins according to your oven. The tray may need to be turned around. When the scones are ready remove from the oven and cool on a wire rack. 

Bye for now!

I’d love to see if you test this recipe. Send me your pictures – I’m @gran.e.bakes on Instagram.