BAKING TIPS: Cookery books- my philosophy

Although my library of cookery books is extensive, it’s not the recipes that are my primary interest – it’s the ideas styles going in to create the recipes. So many hints and tips; how to vary the methods you’ve always known and trusted; new ways of using old ingredients; new ingredients and flavours. It’s this philosophy I apply to my cooking, especially now. Being able to experiment more as cooking is not a job. 

I also have hundreds of recipes and ideas taken from magazines, newspapers and articles from over the years. I’m always experimenting, trying out new and re-discovered dishes and recipes, giving the results away to family, friends and neighbours. They are always willing guinea pigs and welcome the different treats being offered! 

I volunteer with Age UK one day a week and have done for more than 12 years – I love it. Whilst working full time until I was 80, anything not quite turning out to expectations – were donated to my colleagues in the shop. They would happily accept the “over-cooked” biscuits, “dry” cakes and “soggy bottom” tarts, all of which were not inedible, just not good enough to sell. My son (who may be a little biased) will say that even my “failures” knock most other baking and food out of the park! 

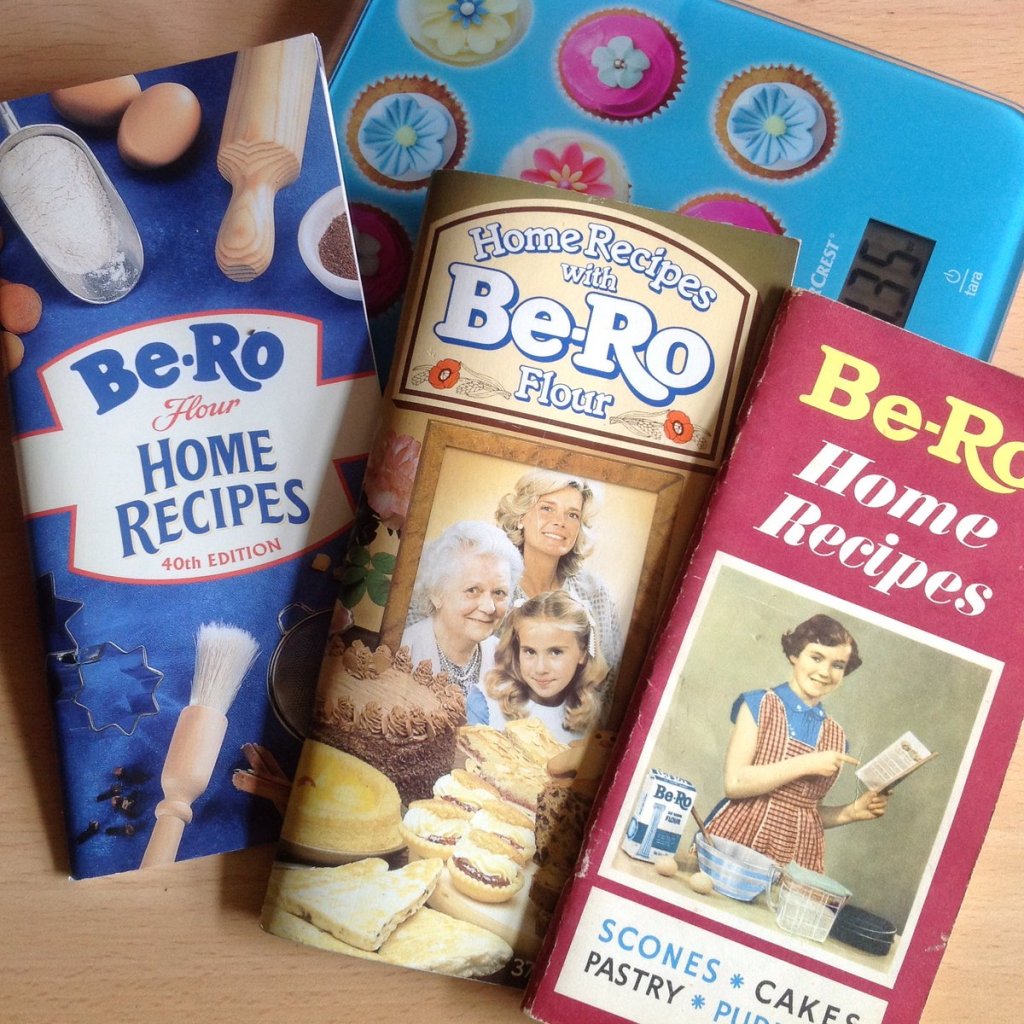
I must add here that anything tried and produced from the Be-Ro book I mentioned previously never seemed to go wrong.

BAKING TIPS: Biscuits

Easy to make, good to eat and great for sharing here are two tried and tested family favourites. 

Couple of hints and things to remember …… 

  • a) leave a space between “splodges” when spooning mix onto your baking tray as they’ll spread during baking 
  • b) biscuits are crisp, cookies are softer, so there’s a longer oven time for biscuits. But keep an eye on them as they can burn easily! 

Ginger Biscuits 

Heat oven to 160-170F, gas mark 3. Have two large baking trays or three medium – butter greased and baking paper lined ready. 

  1. First mix together: 
  • 8oz self-raising flour 
  • Two teaspoons of ground ginger 
  • 4oz golden caster sugar 
  • A good pinch of sea-salt 

2. Then melt: 

  • 3oz butter 
  • Two tablespoons of Golden Syrup 

And mix together with the dry ingredients. 

3. Spoon the dough mix (heaped teaspoon or so) onto the baking trays. 

4. Bake for around 15 minutes, by which time the mix should have spread and be golden brown. 

If you have any glace ginger press small pieces into the mix whilst still warm. This will crisp up as they cool (leave on tray). 

5. Finally, remove to a wire rack. 

Peanut Butter Cookies 

You’ll need:

  • 5oz of butter
  • 5oz peanut butter
  • chopped peanuts
  • 4oz caster sugar
  • 4oz brown sugar
  • 1 large egg
  • 1/2 teaspoon of vanilla essence
  • 4oz self-raising flour
  • 1/2 teaspoon bicarbonate of soaf
  • 1/2 teaspoon of salt
  • 4oz porridge oats
  1. Soften the butter (not melted) and mix with the peanut butter (crunchy or smooth, your choice). Add the chopped peanuts also. 
  2. Mix the golden caster sugar together with the soft brown sugar 
  3. Beat the egg and stir through half a teaspoon of vanilla essence. 
  4. Now mix the self-raising flour, bicarbonate of soda, salt with and porridge oats. 
  5. Now bring all these mixes together a little at a time, mixing with a palette knife. 
  6. Form the “dough” into small balls, walnut sized and place onto the prepared baking trays well apart 
  7. Flatten slightly with a fork and sprinkle with chopped peanuts 
  8. Bake in a hot oven 170-180F, Gas Mark 4-5. 

If you want cookies 12-15 minutes, biscuits turn down and cook for longer until crisp. 

I’d love to see if you trial this recipe. Send me your pictures – I’m @gran.e.bakes on Instagram.

BAKING TIPS: Ovens. A bad workman always blames his tools.

Something I’ve learnt over time is that no two ovens are the same.

During my working life as a cook I have used many differing ovens and ranges – Large, Small, Domestic, Commercial, Gas, Electric, Aga and the rest. 

Recipes can only provide indicative temperatures and cooking times, the cook must be flexible in applying these to their own environment.

This is a major reason why many new cooks suffer disasters; be prepared to test and try, then test and try again! 

When I was demonstrating and asked to give definitive times and temperatures my advice was always to be prepared to be flexible and to use your own judgement; even experienced cooks get things wrong, that’s how they learn! 

So be comfortable with experimenting when you’re getting to know your oven.

Hope this helps. Bye for now!

BAKING TIPS: Social Distancing – Bakes for when staying home. Part 2.

Well, and here we are. How many weeks are we in of the big shut down? I’ve lost count. I was disappointed that I couldn’t continue to do my Sainsburys shop, which was my only foray into the world outside my cul de sac. But the upside I’m happy to be spending happy hours trawling through old (I mean ancient) cook books and scribbled notes on menu’s from the past, home and jobs. Although today I’m testing a vegan tea loaf – in the oven at present – will give the verdict later….

Following day …

Sliced tea loaf in half to test the centre. This is not a cake nor is it bread – texture definitely dense and sticky, a true malt loaf. Let’s say a “marmite” bake. Certainly full of flavour from all the fruit. So how did I do it?

Vegan Tea Loaf

You will need:

  • a 2lb loaf tin greased and lined. 
  • 6oz raisins 
  • 2oz chopped dates 
  • 1 mashed banana 
  • 2oz brown sugar (dark or light) 
  • 7oz wholemeal self raising flour 
  • 2oz ovaltine powder or granules (or other malty drink) 
  • ½ teaspoon baking powder 
  • ½ teaspoon bicarbonate of soda 
  • ½ teaspoon salt 
  • 2 fluid oz’s plant milk 
  • 1 teabag (preferably earl grey for best flavour) 

Method

  1. Set the oven to 4-5 gas (180 fan) 
  1. In a bowl ass raisins and dates, teabag on top. Cover with boiling water and leave to soak for 15 minutes minimum 
  1. In a large bowl add all the dry ingredients, mix well  
  1. Empty wet stuff – raisins and dates (without the teabag) banana and half the milk and stir thoroughly. If its too stiff add the rest of the milk and any remaining soaking liquid 
  1. Spoon into a lined tin and bake for 40 minutes.  
  1. Test the centre with a skewer, if its still sticky then return to the oven for 10 minutes (cover with foil if the top is too dry) 
  1. Cool and slice – what do you think? My granddaughter loved it! 

Ginger and caramel tray cake

Now for an old favourite, even with folk who say they aren’t keen on ginger.  You will need an oblong tin – deep – not swiss roll type. 8” x 12” (ish) greased and lined. 

  • 7oz soft butter 
  • 5oz brown sugar 
  • 3 table spoons black treacle  
  • 3 large eggs 
  • 8oz self raising flour 
  • 1 teaspoon ground ginger (optional) 
  • 1 small jar diced stem ginger in syrup 
  • 1 tin caramel (nestle) 

Method 

  1. Medium oven gas 4 (160 fan) 
  1. In a large bowl place all ingredients (but only 2 large spoons of caramel and 2 of diced ginger, not the syrup) 
  1. Whisk it all together thoroughly 
  1. Place into a tin and cook for 30 minutes – it should be firm and risen – if its not put it back covered with grease proof paper for 10 more minutes 
  1. When cooked place it on a cooling rack 
  1. Whilst warm, prick the top with a fork or skewer and poor over some of the ginger syrup then spread thinly with caramel 
  1. Leave it to cool still in the tin 
  1. Cut it into squares 

Enjoy! Definitely one of my favourites. See what the vegans are missing – sorry folks! 

Just a final note – we are in for a tough time. Weeks or months, who knows? Everyone is affected in a different way. I have had long periods of working from home and it was always the lack of social contact that was hardest to cope with – but at least it prepared me for this! I am fortunate in having family close enough to bring in my supplies and show a cheery face at the window. Myself and my neighbours, all elderly and living alone, are keeping an eye on one and other and speaking on the phone. We have a rota and although now we cant help out by shopping, we can keep chatting – a laugh and a moan – but we are in contact. I’m sure you are all doing the same. So keep it up – stay fit and well. Chat, moan, and laugh away, till next time.

Bye for now. Love from Gran E x

I’d love to see if you trial this recipe. Send me your pictures – I’m @gran.e.bakes on Instagram.

BAKING TIPS: Scones (how do you pronounce it?!)

Hello Again!

Let’s continue with scones. This is a similar method to pastry but with a different ratio of fat to flour. Scones need a hot oven so don’t forget to pre-heat to around 220 degrees, around gas mark 7 or 8.

The basic ingredients for 6-9 scones (depending on size!): 

  • 10oz [284g] Self raising flour 
  • 2oz [57g] butter 
  • ½ teaspoon salt 
  • A large egg (beaten) 
  • Milk (around ½ a cup) to add gradually 

For sweet scones: 

  • 2oz [57g] of caster sugar  
  • 3-7oz ([85-190g] dried mixed fruit, chop small especially if using apricots or dates 

Savoury Scones: 

5oz [140g] or so grated cheese 

Teaspoon of mustard mixed in with the egg 

Herbs/Olives/Sundried Tomatoes can be added to the dry mix 

After rubbing in the fat into the flour add your dry ingredients. Next add the beaten egg and mix with a palette knife. The dough should be much softer than pastry but not sticky wet!

Handle the dough as little as possible – the heat and moisture from your hands can have a significant impact. Form into a soft ball on a floured work surface. Pat this ball gently out into a flat shape about ¾inch [2cm] thick, but not too thin.

For small scones use your smallest serrated round cutter. Alternatively, pat into larger circles and cut across the top into wedge shapes. Brush the top of your scones with milk; for cheese scones sprinkle a little grated cheese over the tops. 

Keep an eye on your scones whilst in the oven, they cook quickly. You’ll see them rise after about ten minutes, then need a further 10-15 mins according to your oven. The tray may need to be turned around. When the scones are ready remove from the oven and cool on a wire rack. 

Bye for now!

I’d love to see if you test this recipe. Send me your pictures – I’m @gran.e.bakes on Instagram.

BAKING TIPS: Social Distancing – Bakes for when staying home. Part 1.

What a strange, scary-sad time we are experiencing, unlike any other period I have known.  Having an interest in food and cooking is keeping me sane. Flour is in short supply – although I usually keep a good stock (which is dwindling) – an appreciated Mother’s Day gift of 2 large bags was very welcome. Over Easter I was trawling my old recipes – an unusual Simnel cake using chocolate is a tasty treat!  

You will need a deep 8” (20cm) cake tin with a loose base or a springform tin, greased and lined. Set the oven to gas 4 (160 fan). 

Ingredients: 

  • 8oz raisins – soaked in (enough to cover) a sweet sherry, wine or amaretto liquor is good 
  • 8oz butter – a block, softened 
  • 8oz golden/caster sugar 
  • 4 large eggs – beaten 
  • 9oz plain flour 
  • 2oz coco powder 
  • 1 level teaspoon baking powder 
  • 1 level teaspoon bicarbonate soda 
  • 1 teaspoon vanilla essence 
  • 1 small carton plain yogurt or soured cream 
  • 1 packet of block marzipan (to cover the finished cake) plus an extra block to form eleven small balls (apostles!) to decorate 
  • 1 bar plain chocolate to melt over the marzipan 

Method 

  1. Mix all the dry ingredients together in a bowl 
  1. Beat together the butter and sugar in a separate bowl 
  1. Slowly add the egg and vanilla essence to the butter and sugar 
  1. Fold in the dry mix 
  1. Add the fruit with the liquid, yogurt/soured cream 
  1. If the mixture is still a little stiff, add a drop of milk 
  1. Transfer to the tin and bake for 1 hour and 15 minutes 
  1. Test the centre with a metal skewer, it should come out clean (if not put back into oven cover top with greaseproof paper and give it another 10 minutes) 
  1. Once cooked, leave to cool 
  1. Brush the top of the cake with warm Jam (to stick the marzipan) 
  1. Dust surface of the table and rolling pin with icing sugar and coco powder to prevent sticking 
  1. Roll out the marzipan (if it’s difficult put it in the microwave for 10 seconds) and lay over the cake 
  1. Make 11 balls of marzipan and roll them in the coco and icing sugar 
  1. When the cake is covered in jam – then marzipan – melt the chocolate with a knob of butter and pour over the cake, place the balls around the edge  

Vegans, have you discovered the alternative to egg whites?

Aquafaba! Yes, this magic liquid comes from draining your chickpeas! It does take longer to whisk – but reasonable results are obtained. A large stand mixer works best and you can leave it running whilst getting on with preparation. A hand (electric) whisk does the job as well, although you need to stand for around 10 minutes – perhaps the aquafaba in some tins is more watery. 

Before you venture into proper meringues, maybe you would like to try this simple version.

Macaroon biscuits. 

  • Aquafaba from chickpeas thoroughly whisked until fairly stiff 
  • 4oz caster sugar 
  • 1 teaspoon corn flour  
  • 2oz ground almonds 
  • 4oz desiccated coconut 

Method 

  1. Put the oven to gas 4 (fan 160-170) 
  1. Mix together the dry ingredients 
  1. Gently fold into the whisked aquafaba (make sure the dry mix is well incorporated) 
  1. Have ready 2 baking sheets lightly greased and covered with baking paper or rice paper 
  1. Place a dessert spoon full of mix – widely spaced – onto baking sheets. Flatten slightly with the back of the spoon (dipped in water to prevent sticking) 
  1. Bake for 20-30 minutes until firm (not brown) 

I’ll sign off this section – asking you all to stay positive – keep in touch with family and friends… from a distance! Live from week to week, this will pass.  

Love to you all, Gran E 

I’d love to see if you trial this recipe. Send me your pictures – I’m @gran.e.bakes on Instagram.